Greateyes CCD camera
Pre-installation benchtop test
Before installing the camera into the chamber, it is a good idea to test that the camera can capture dark images properly on the benchtop.
Ensure the camera is secured into its metal cylinder so that no ambient light reaches the sensor.
Connect the camera to its control unit using a 50-pin cable, and connect the camera to a Windows computer using an ethernet cable. Connect the control unit to electrical power. Switch on the control unit, and ensure that the LED light on the camera electronics turns on
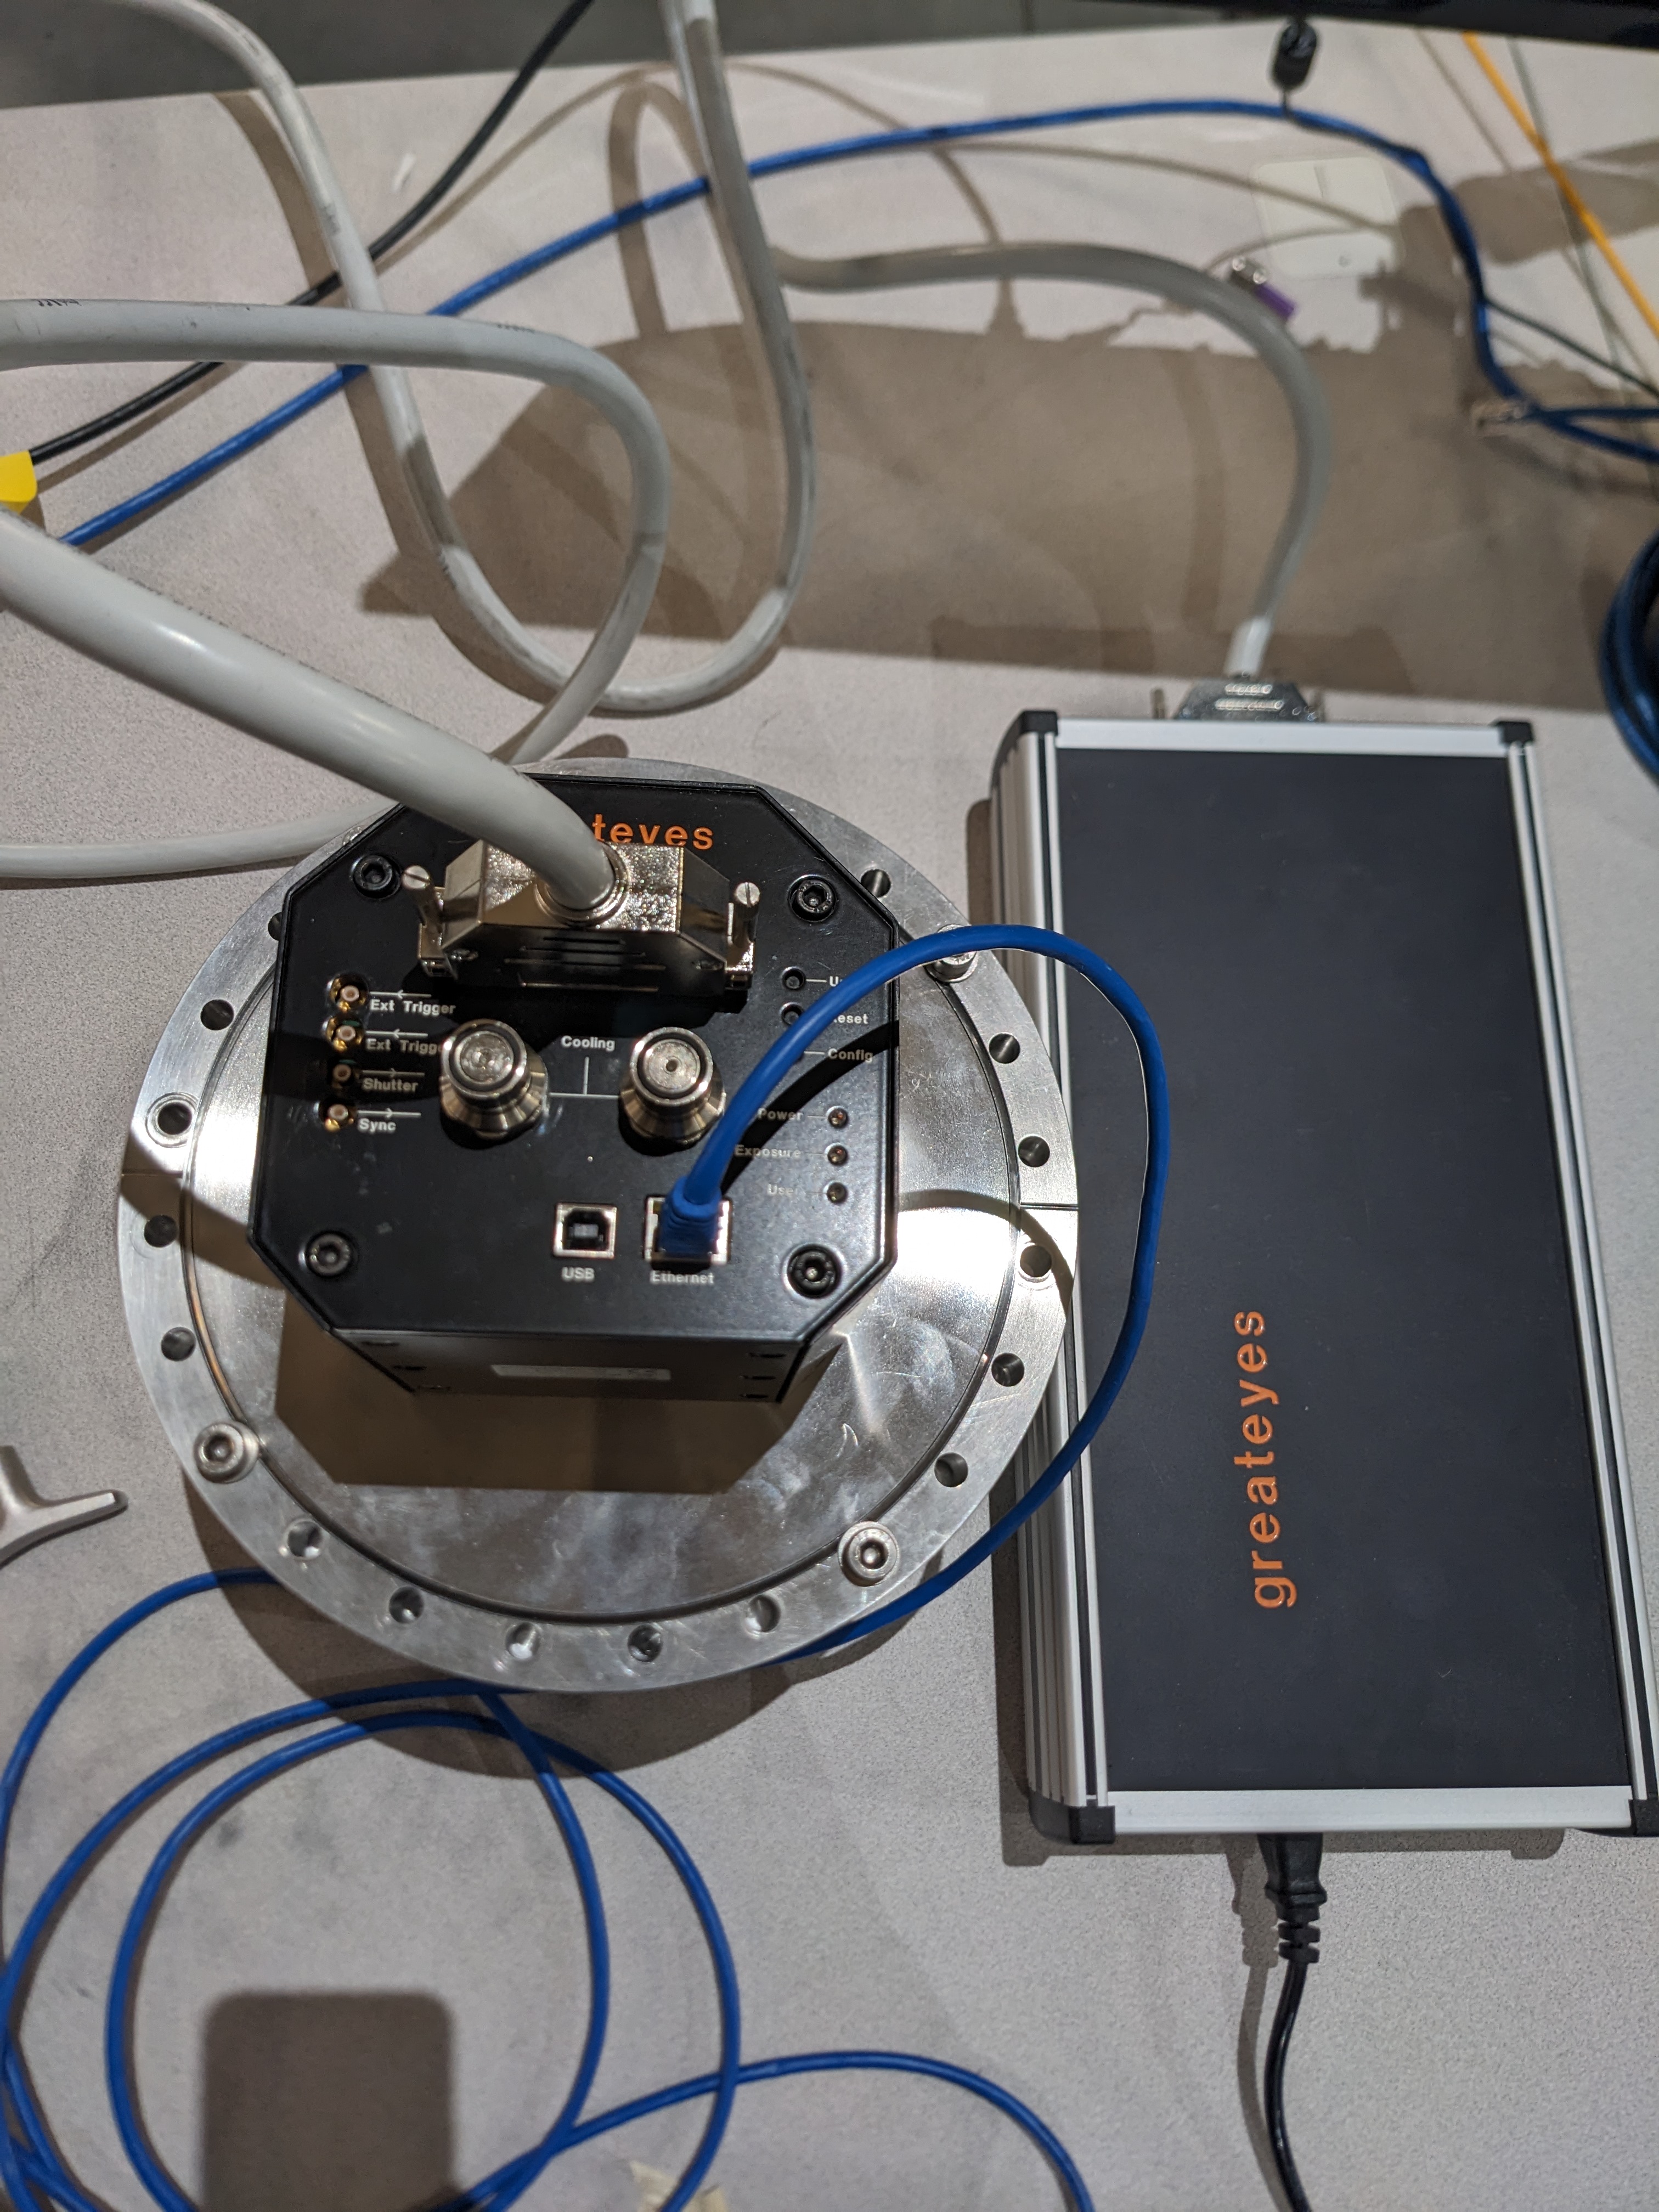
Greateyes camera ethernet and 50-pin connections during benchtop testing. Connect the windows computer to the camera’s IP address. The correct IP address can be found using the command prompt and pinging the camera server (e.g., xf07id-det1.nsls2.bnl.local).
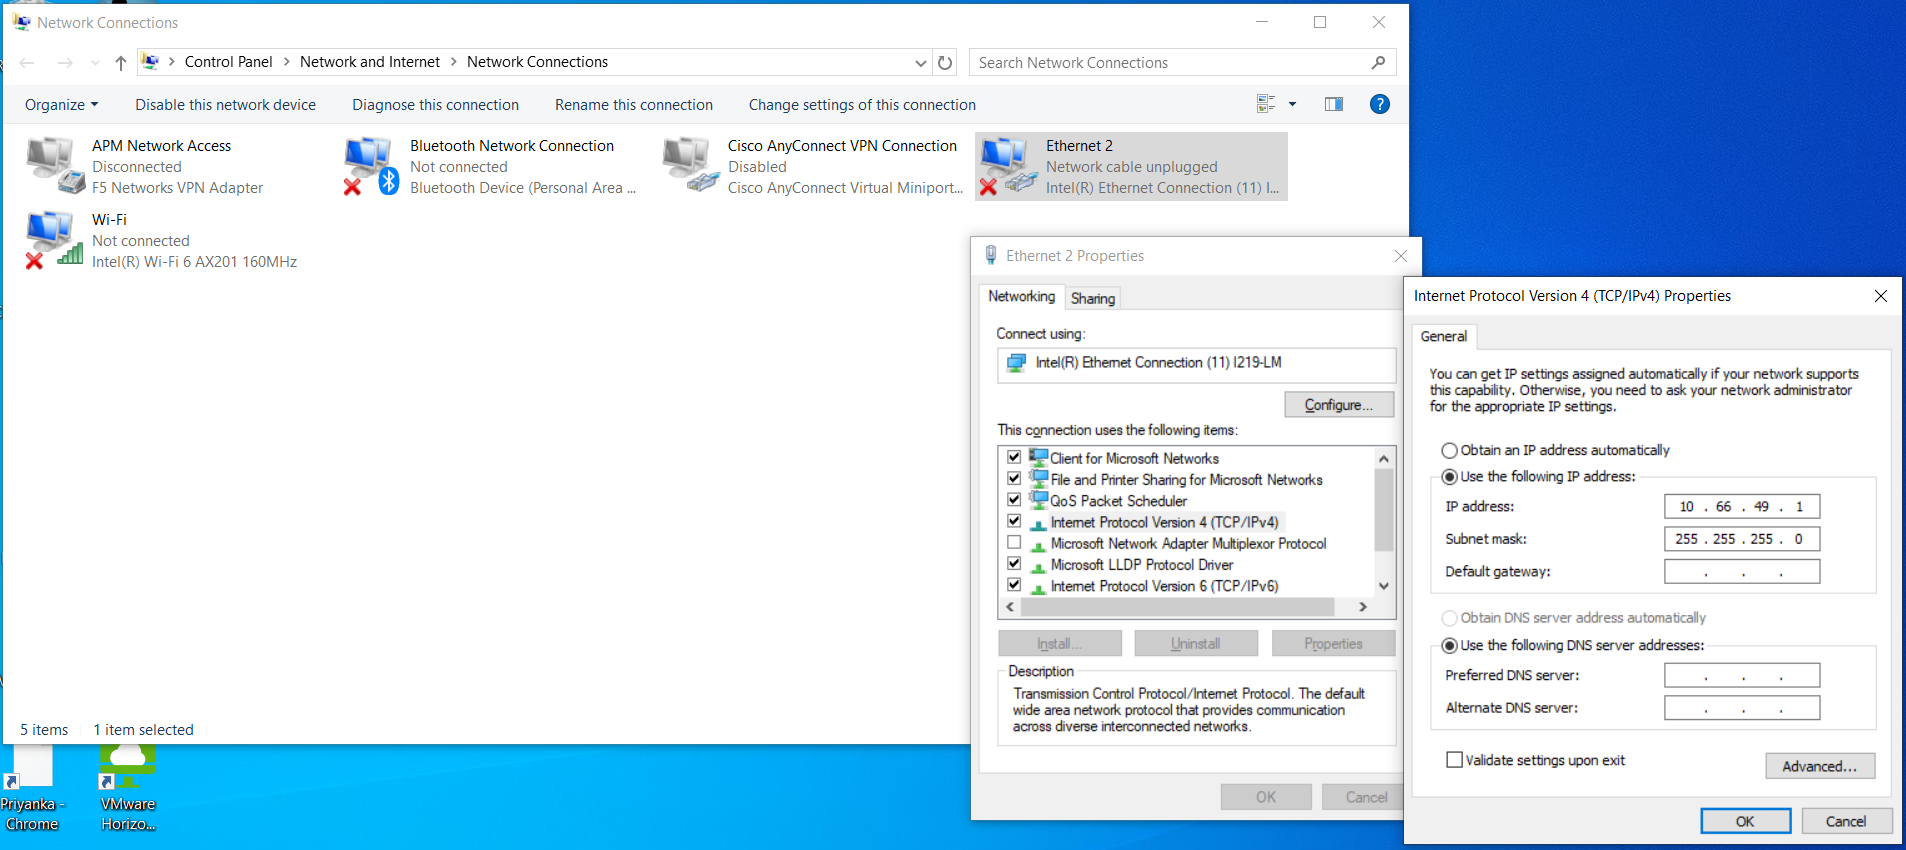
Connecting to Greateyes camera’s IP address via ethernet. Ensure the camera server is connected by entering the IP address onto a web browser, using the same Greateyes login as normal, going to the System tab, and checking that the Camera server shows green.
Download and open the greateyesVision.exe software and connect to the camera.
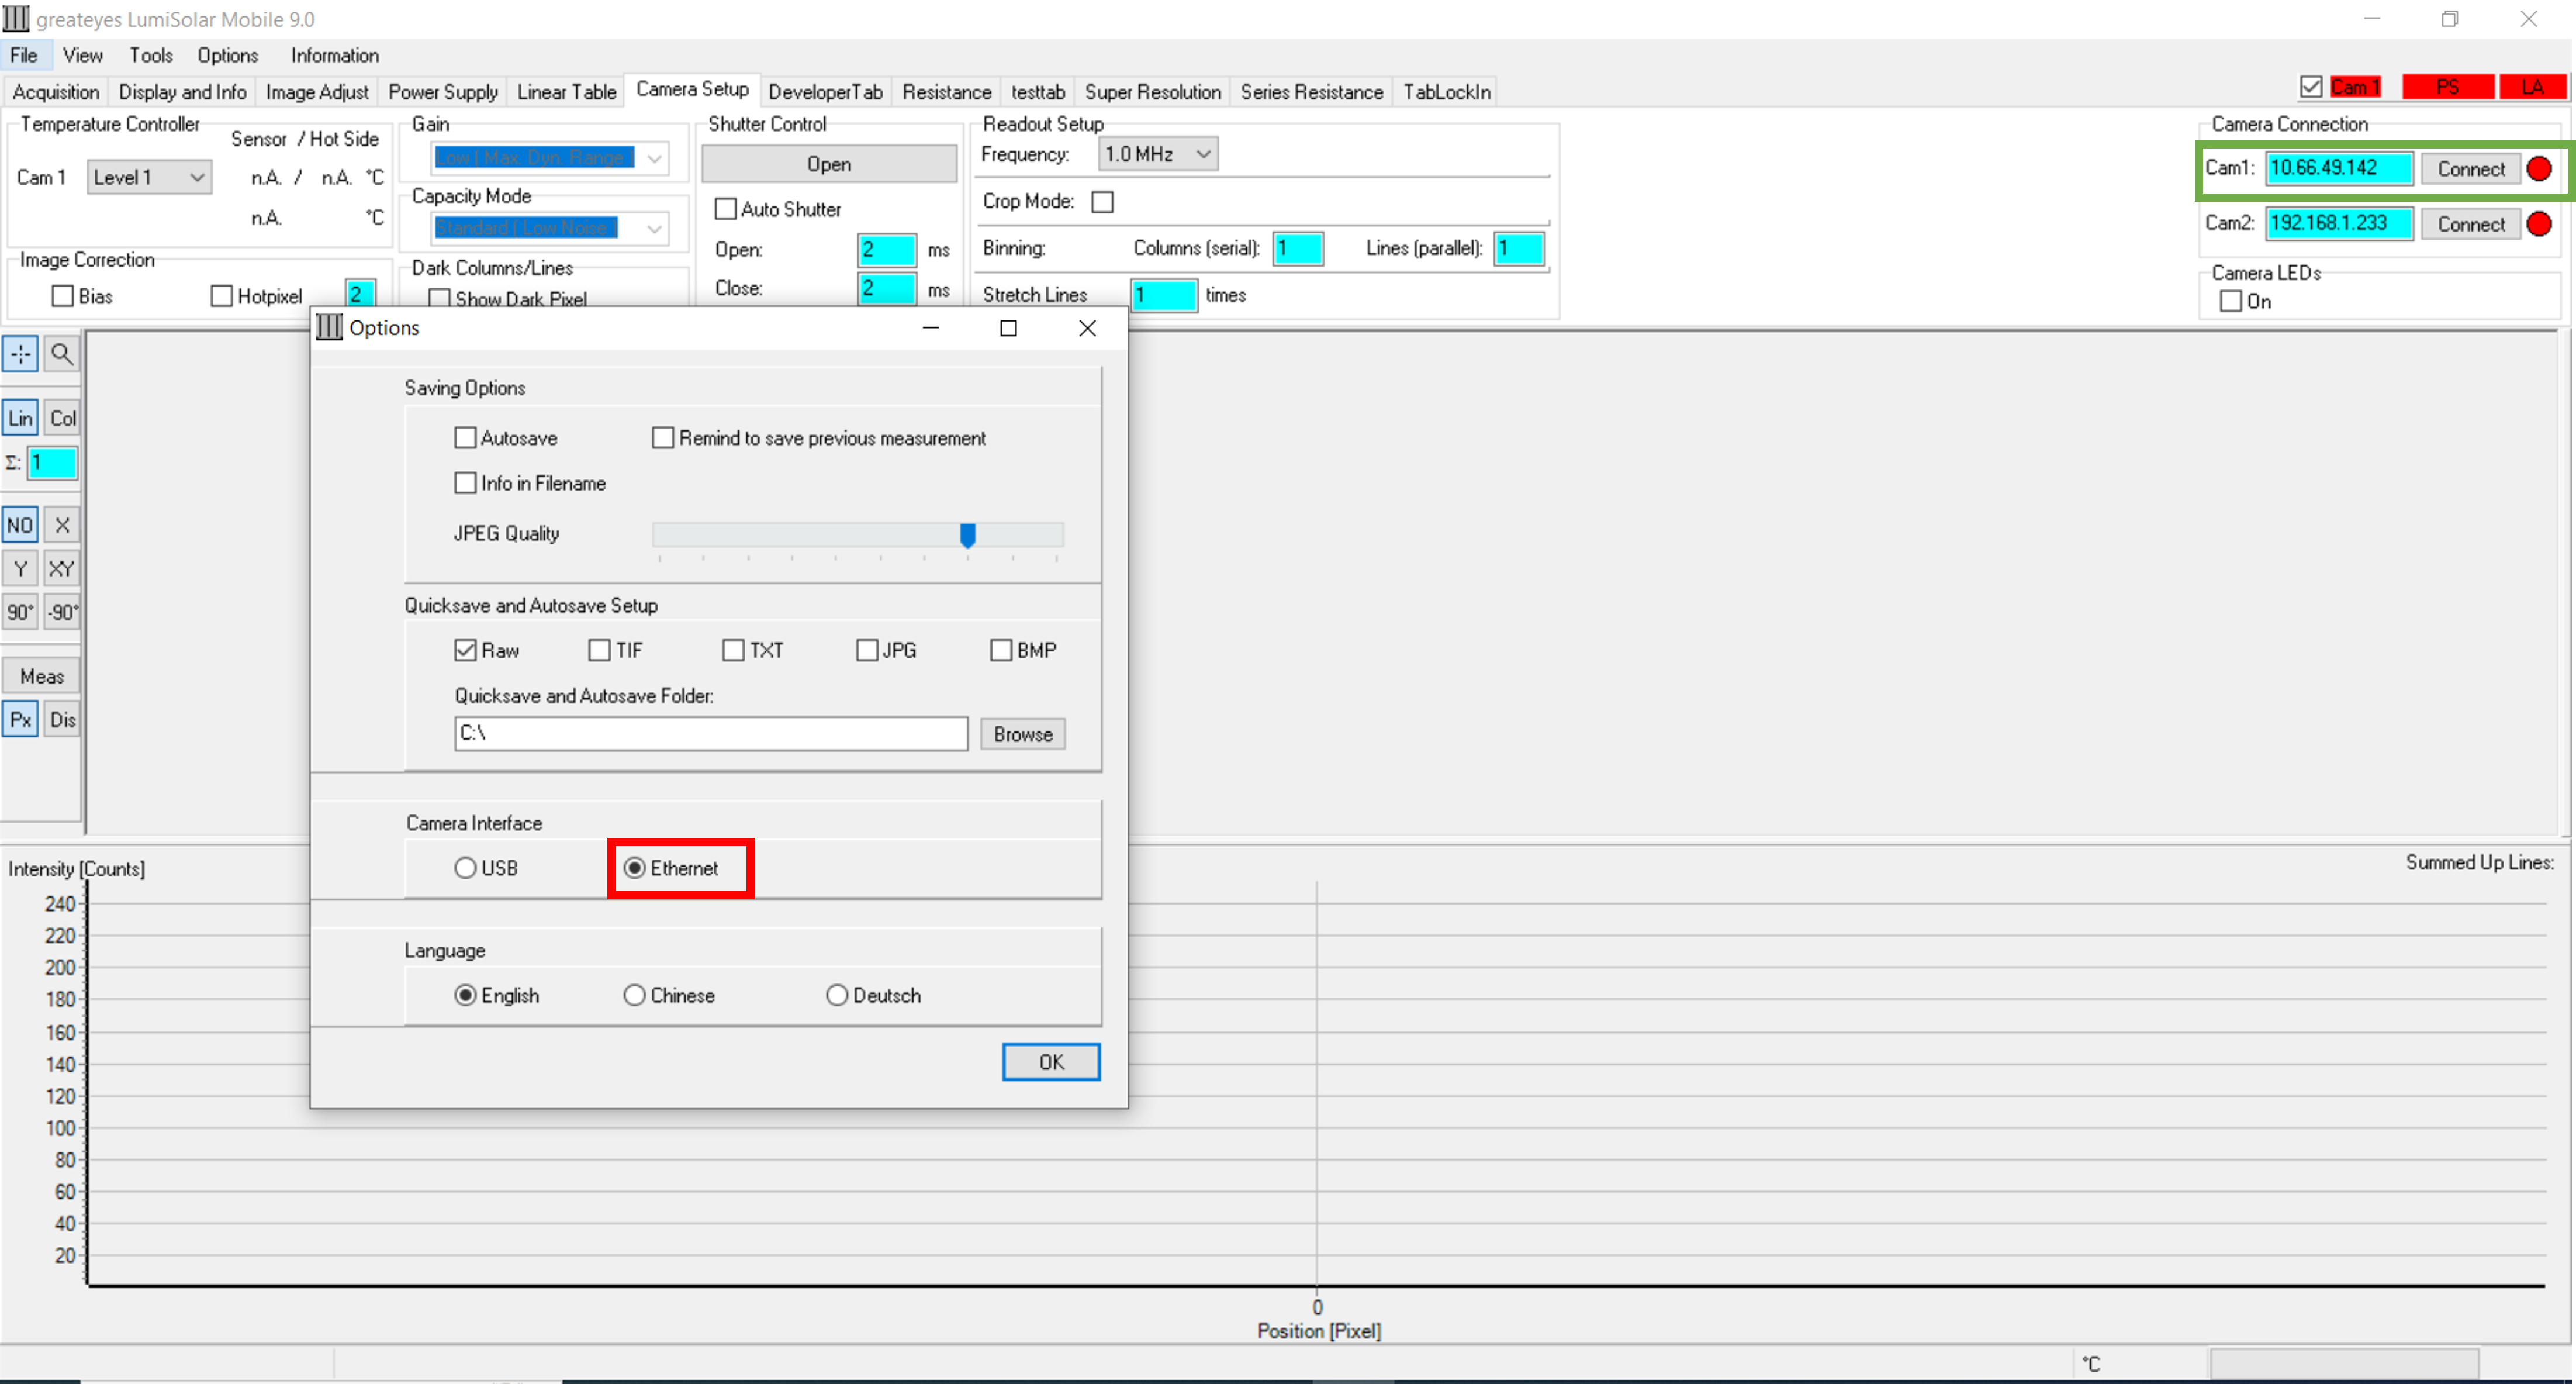
Connect to the camera by first going to Options and then selecting Ethernet in the Camera Interface section (red box). Then, go to the Camera Setup tab, type the IP address for the camera, hit the enter key so that the box shows as cyan, and then click Connect. The red light should turn green after the camera is connected. In the Camera Setup tab in the Temperature Controller section, Cam1 can be set to the desired temperature. On the benchtop, it is possible to cool the camera moderately (down to -20 °C) using air alone; further cooling requires the camera to be connected to water. In the Readout Setup section, the Frequency can be set to 4 amps so that all 4 quadrants of the camera are read out.
In the Acquisition tab, click on the Single Shot button to capture one image. The exposure time and other capture parameters can be adjusted. The resulting image and intensity line cuts can be viewed to check if the image is reasonable.
[TODO: Add more detailed/updated notes based on bench testing on 20260226]
Turn on the camera (routine operation)
Switch on the camera controller.
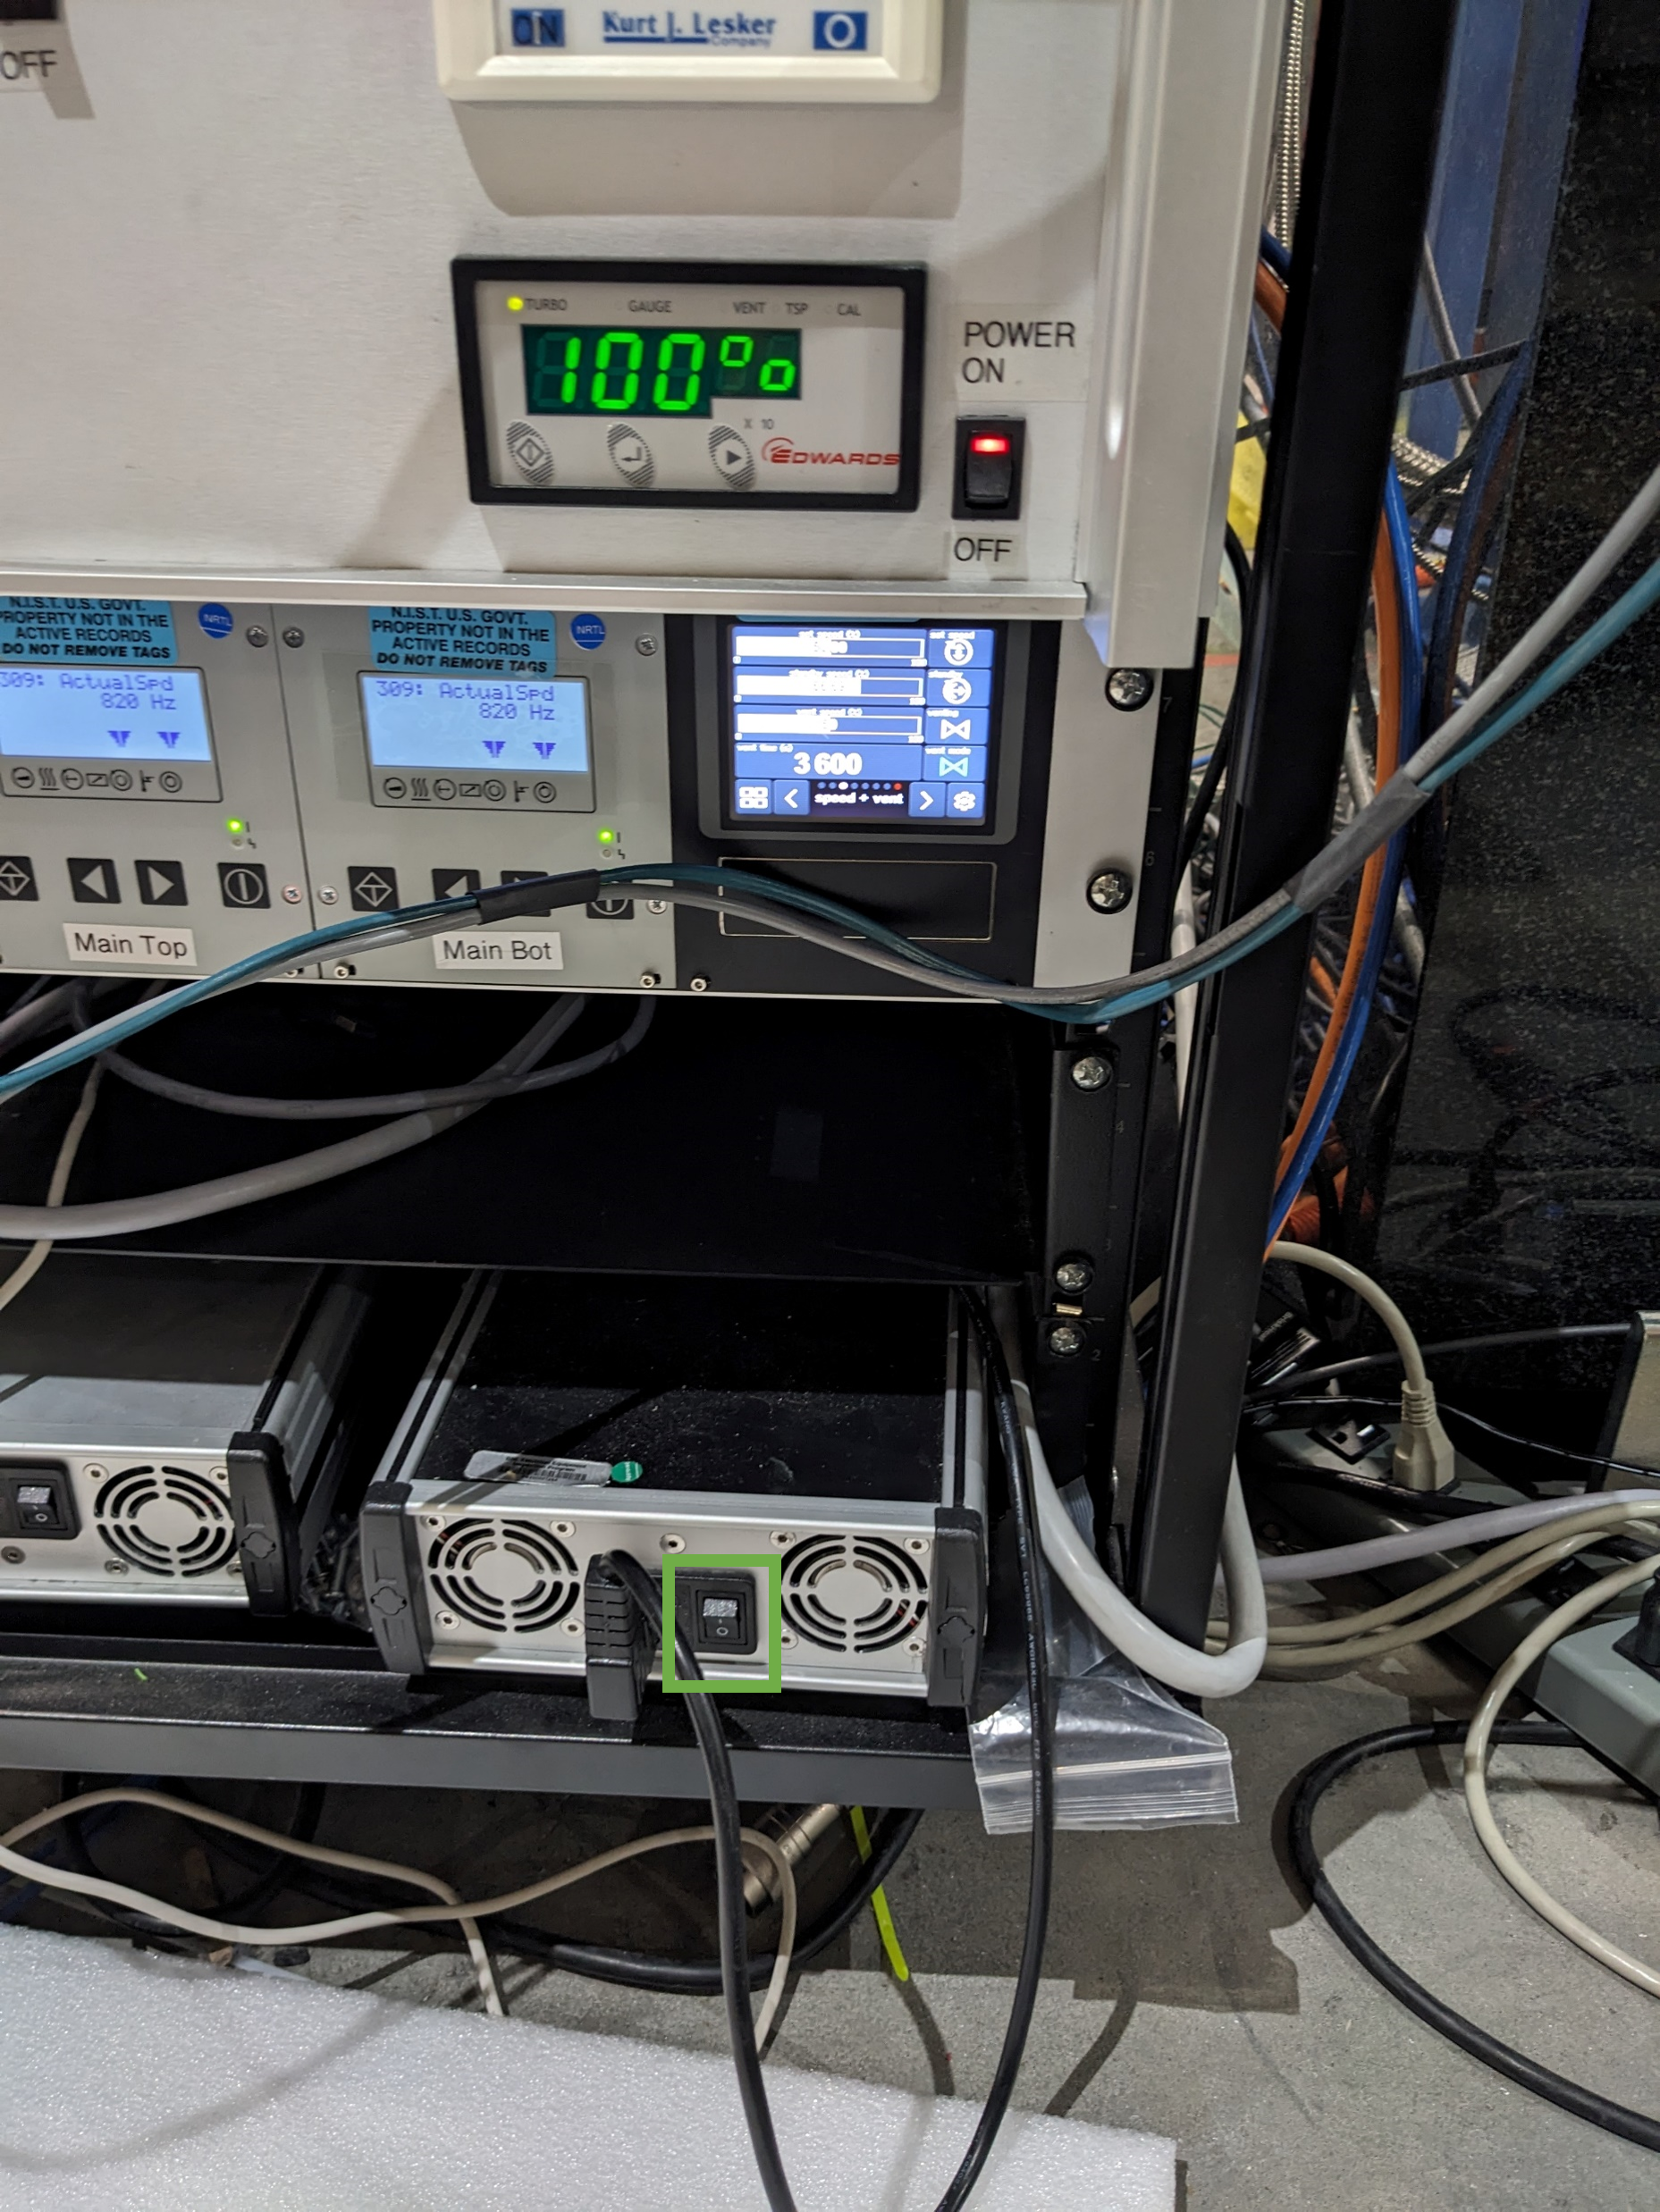
Greateyes camera power switch Open a Google Chrome window, and go to xf07id-det2.nsls2.bnl.local. Log in using Username: admin, Password, greateyes. Click on “System” on the left-hand panel. Click “Start” on any “System Status” item that has a red light in front of it, and then click “Refresh”; this may need to be repeated several times until all lights show green.
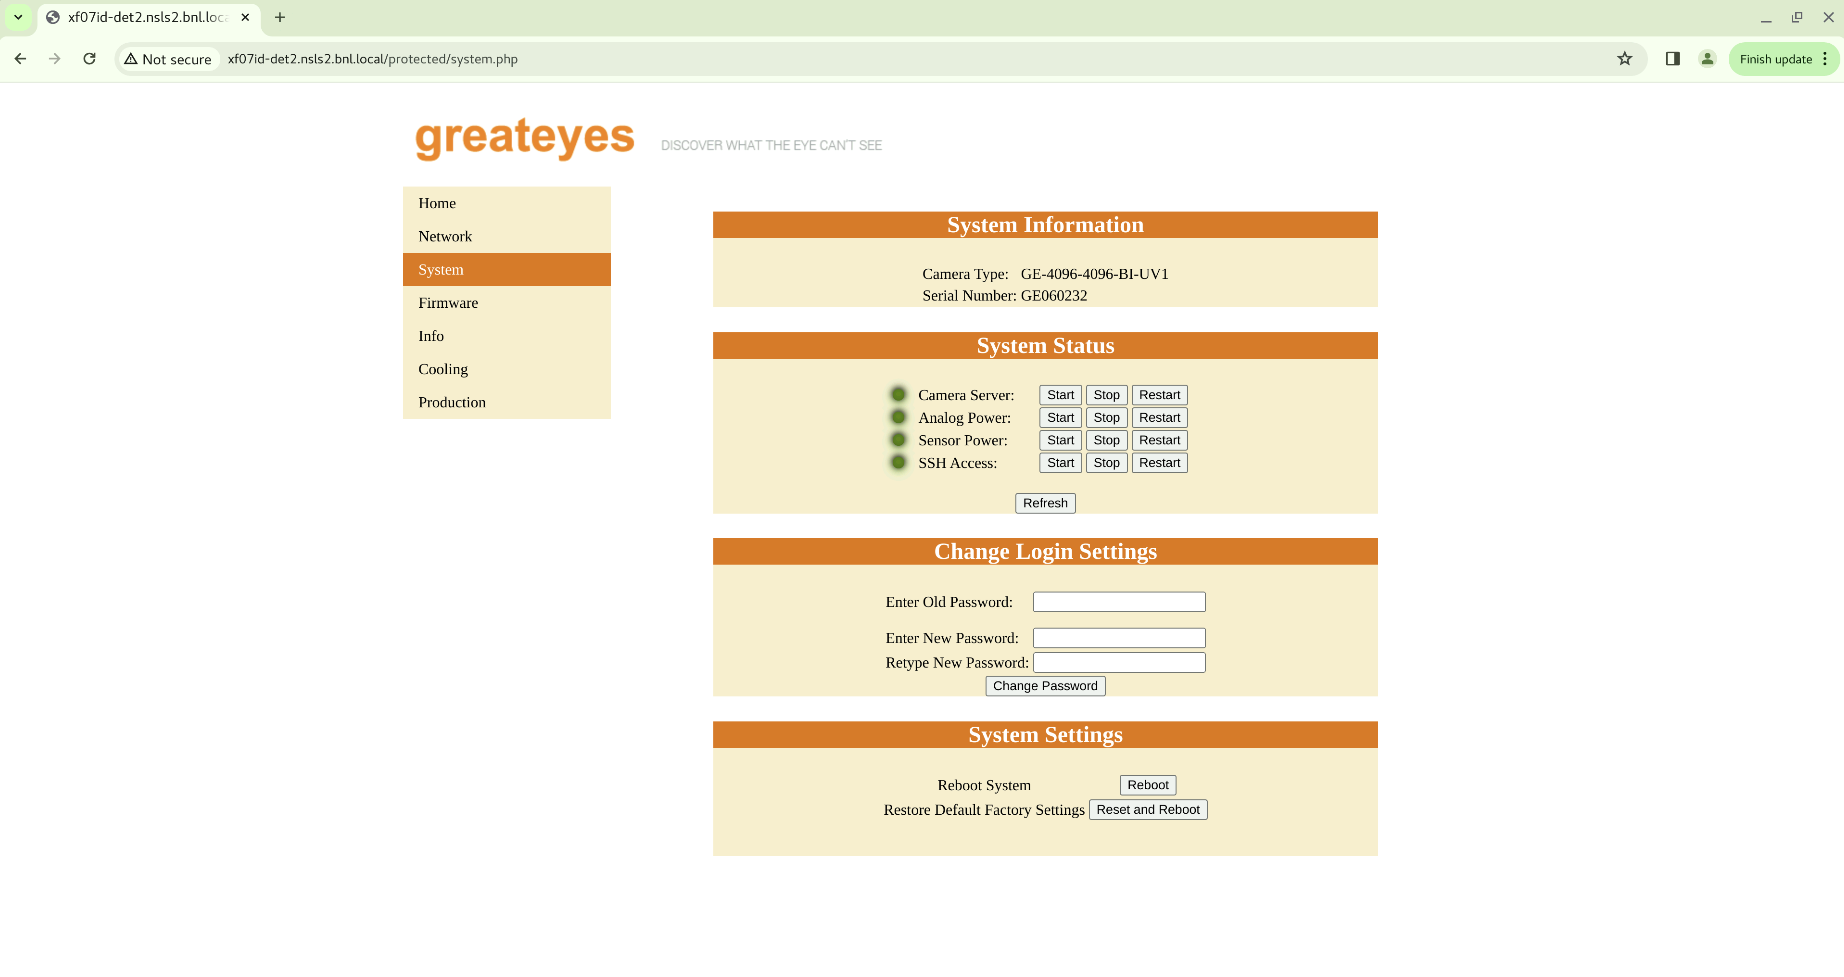
Greateyes system status This is the lowest level control of the hardware. In some cases, the Analog Power might appear to be green, but it is not actually on. If hitting the Stop button on Analog Power does not turn it off, the Analog Power was not on to begin with. In this case, switch off the camera for a few minutes and retry turning it on.
Log into a new tab in the terminal app.
Access the IOC on which the camera is located.
ssh xf07id-ioc3The WAXS detector is located on IOC 3. The IOCs are the servers that run all of the EPICS code for the hardware. The Bluesky commands call on this EPICS code.
5.Start the camera sot IOC:
```
dzdo manage-iocs start greateyesCCD2
```

```quarto

```
If this was done correctly, you should see the WAXS detector line in the pydm window on the first display flash grey, then purple and finally update with a correct temperature again, with temperature control “disabled”. Change it back to enabled (and set the target temperature back to -80 °C, if it has changed) as soon as you can, so the camera does not warm up too much.
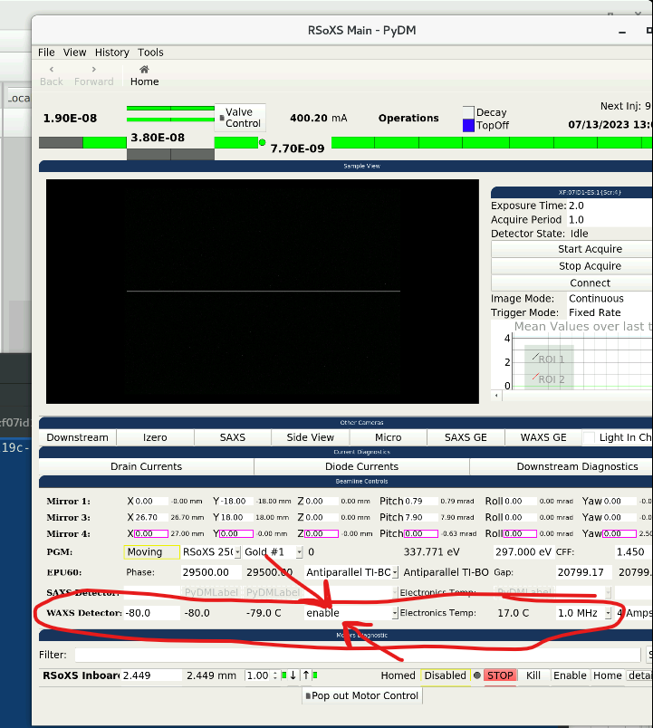
WAXS detector temperature control Restart Bluesky. (TODO: unsure if this is necessary?)
Check that the sensor is working by capturing a dummy image.
It may be necessary to
turn_off_checks()if the camera is retracted, there is no beam, or if another station is running. In this case, also go to DIODE-MTO:1 in Phoebus, and hit Disable on the input enable mask; as a result, the blue square should light up blue, but the corresponding red circle should not light up.Set the desired exposure time in Bluesky (e.g.,
exp 0.01)Capture an image:
RE(bp.count([waxs_det], num=1))If the sensor is working, the image should show some artifacts, such as bad pixels or distinct quadrants, even if it is a blank image. If the sensor is warm, then there will be a more visible intensity gradient in the image. If the sensor is not working, then the image will homogeneously show low intensity, and the camera should be restarted.
Check that the chamber light is not on when capturing an image. One of the signs may be that 4 quadrants are visible in the image. After the chamber light is shut off, wait at least 30 s (sometimes even longer) before capturing an image. To ensure a new dark image is taken, type
dark_...and tab complete to clear the old dark image.
Wait for the camera temperature to cool below -77 °C before starting scans on samples.
Remember to
turn_on_checks()or restart Bluesky before proceeding.
Shut off the camera (routine operation)
- Turn off the camera IOCs by logging into a new tab in the terminal app, running
ssh xf07id-ioc3, and then runningdzdo manage-iocs stop greateyesCCD2. - Switch off the camera controller. Switching off the camera controller will cause the camera to warm up, which is fine for occasional and long shutdowns. On a more frequent basis, however, it is better to switch off the camera for 5 min or less and then turn it back on to avoid the sensor warming up too much.
Store away camera
Ensure that the wire-protection metal cover is secured onto the camera. This protects the wires that connect the sensor to the electronics and should already be on when the camera is installed in the RSoXS chamber.
Greateyes camera wire-protection cover shown from 4 side views Put on the metal cap in front of the sensor chip to protect the sensor.
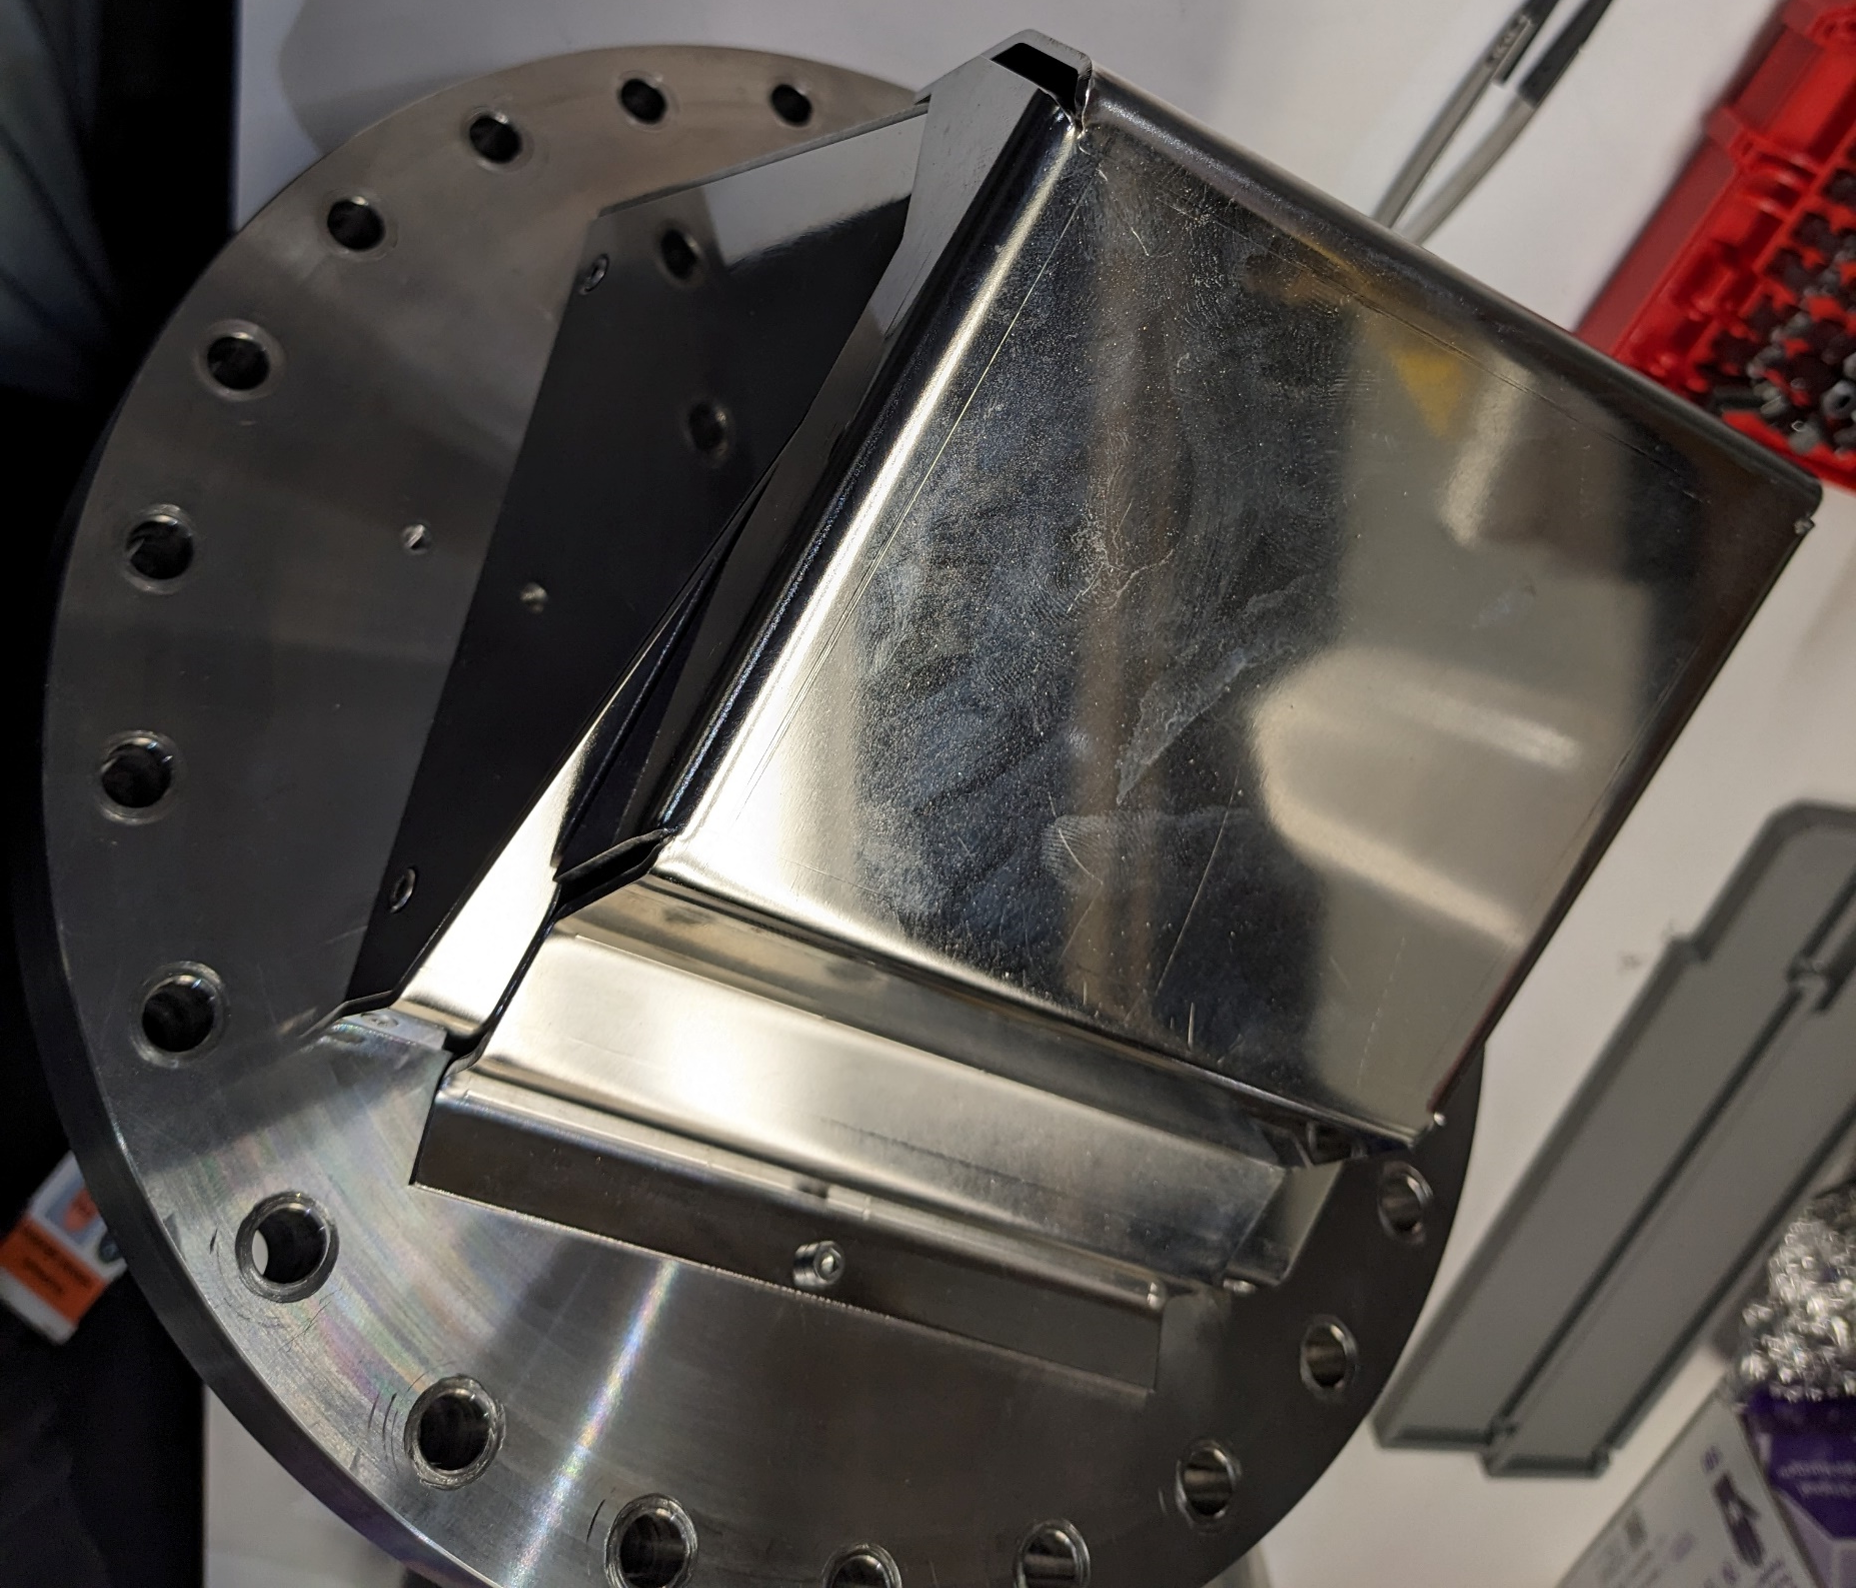
Greateyes camera sensor protection cover used when storing and shipping the camera. Place the camera flange onto the metal cylinder such that the sensor faces the inside of the cylinder, and the electronics face out from the cylinder. Ensure that the leak grooves on the flange align with the grooves in the cylinder. Secure the flange using bolts and washers, being careful to not touch the knife edge, which is facing outside.
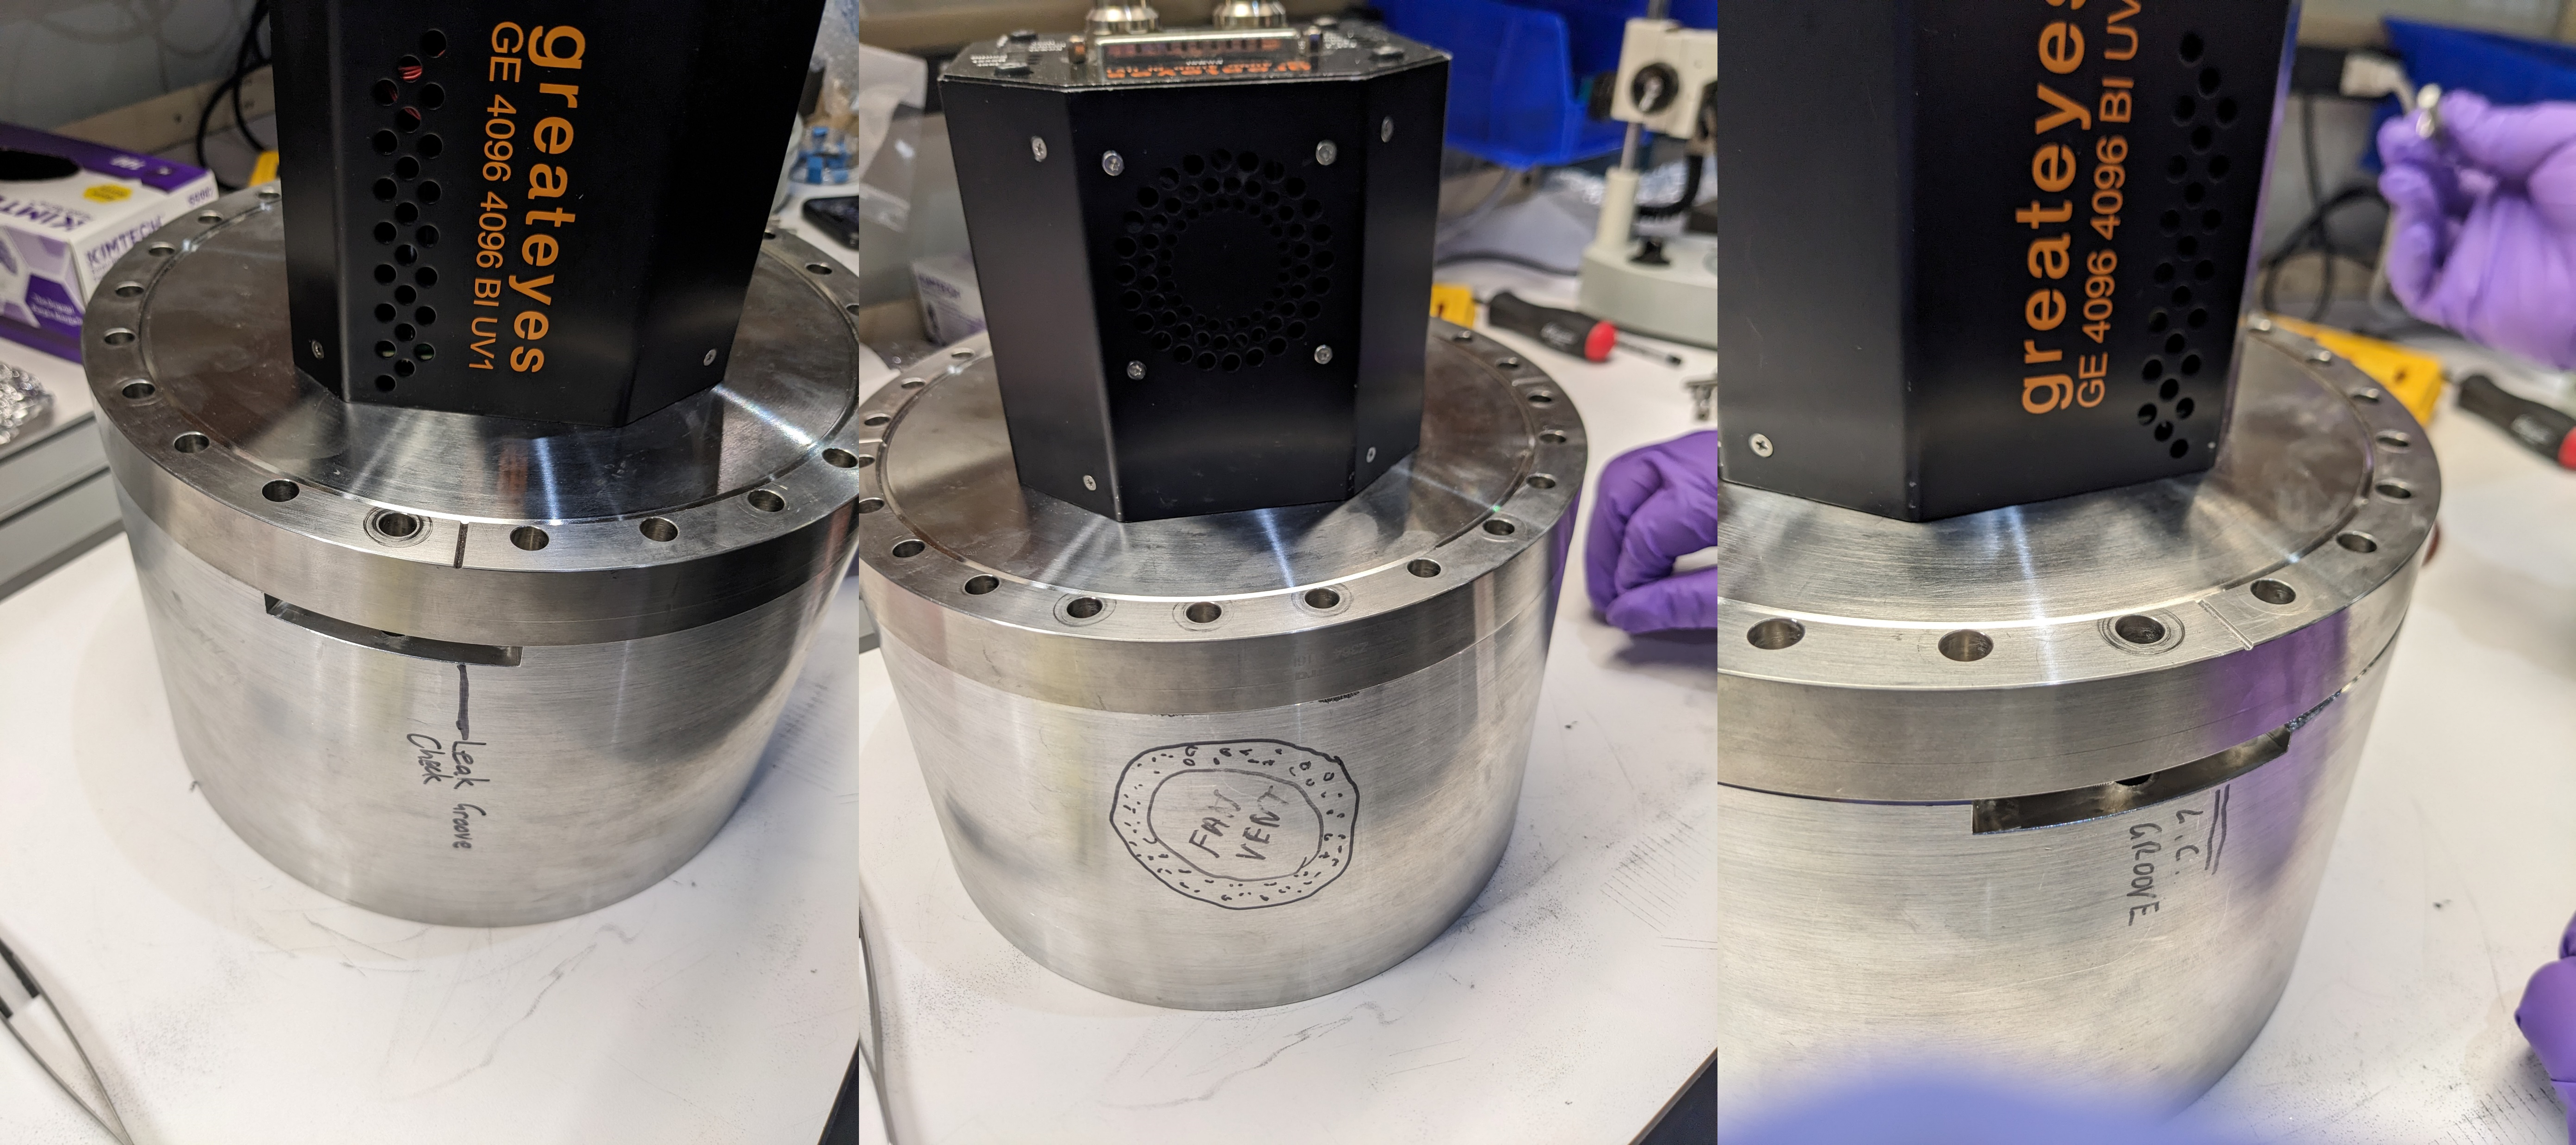
Greateyes camera stored into metal cylinder with sensor facing inside the cylinder. Place this setup into the Pelican case with the cylinder facing downwards. Ensure all sides have sufficient cushioning before closing the Pelican case.